Is your development team working on a large and complex codebase? Do you wish your workspace contained only the minimum files that you need in order to build and run a subset of the system? Looking to improve performance, reduce network traffic, and reduce the disk space required on your development machine?
If you answer yes to any of the questions above, then I’d like to introduce you to a lesser known feature of TFS that can help you: Cloaking.
Simply put, cloaking is the process of defining which folders or files should be ignored the workspace on your development machine
Cloaking a Folder:
Option #1
1. Open Source Control Explorer
2. Locate and expand the folder containing the folder that you would like to cloak
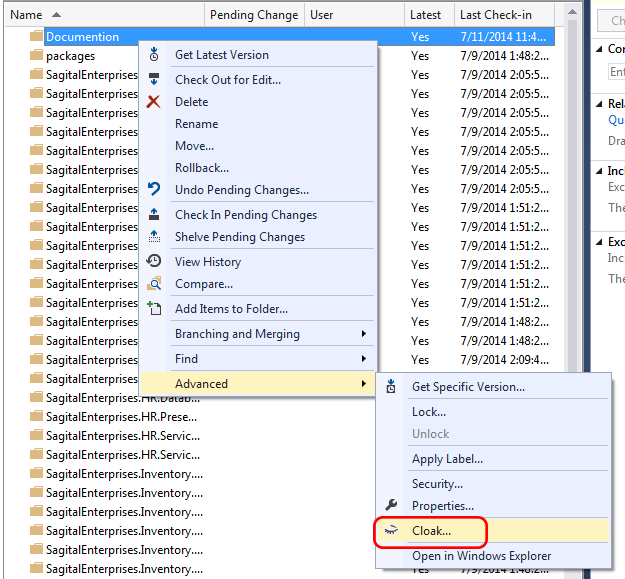
3. Right-Click on the folder
4. Select Advanced -> Cloak
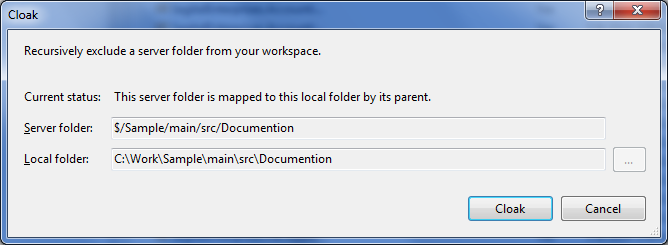
5. Click the Cloak button
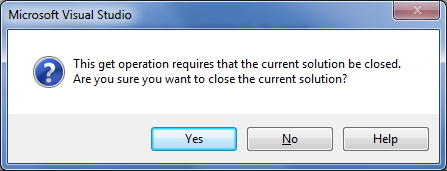
6. Click the Yes button and your solution will close and re-open
Option #2
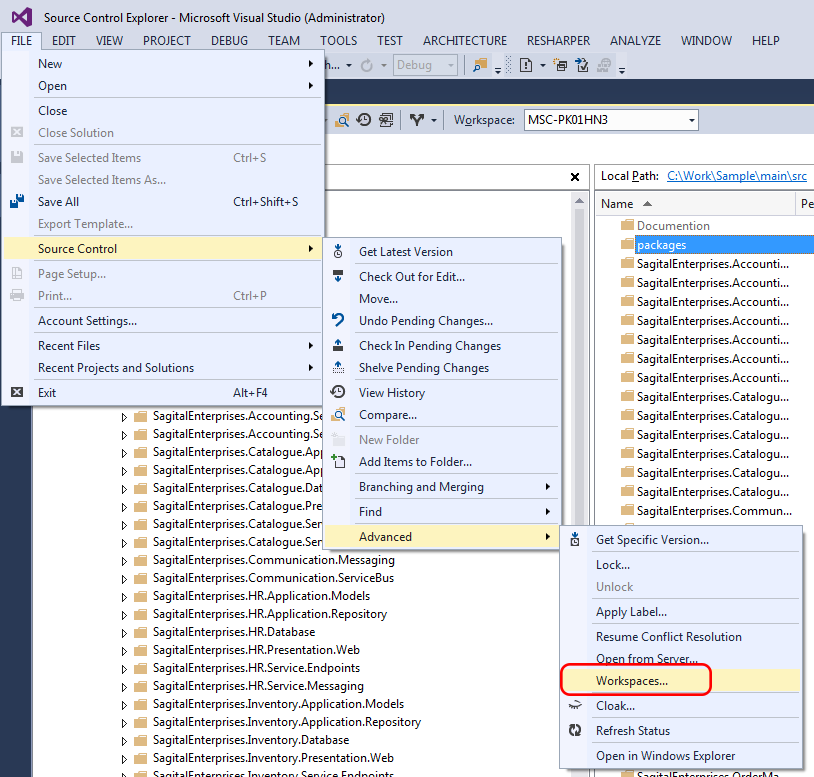
1. Go to: File -> Source Control -> Advanced -> Workspaces
2. Click the Edit button
3. Select Status => Cloaked
4. Select the Source Control Folder by click the Browse (…) button
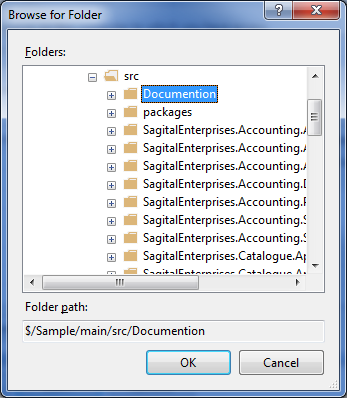
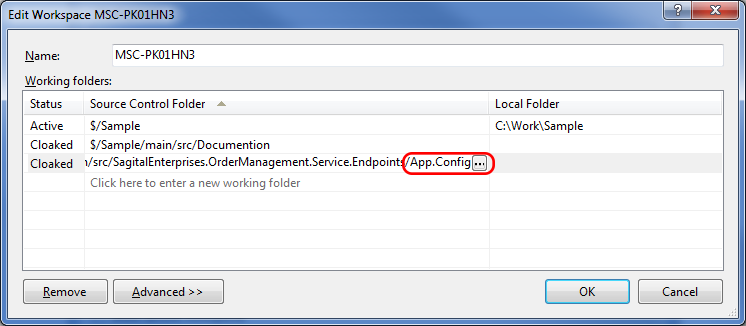
5. Click the Yes button and your solution will close and re-open
6. Click the Close button
The folder should now be cloaked and ignored in your local workspace. It should now appear grayed out in the Source Code Explorer.
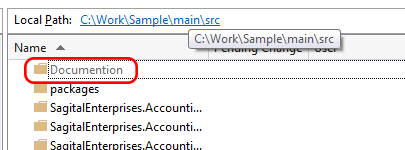
Cloaking a file:
The Visual Studio UI does not offer a built in functionality to cloak individual files so one cannot just right-click the file name and cloak it. It is however, fully supported and can easily be accomplished by using option #2.
So…
1. Complete steps 1 -4 defined option #2
2. Once you have selected the folder containing the file, manually complete the file name.

3. Continue with steps 5 and 6 to apply the cloaking
Now, every time you get latest from the root of your workspace, the Documentation folder and the App.config files will be ignored and not retrieved.