A common behavior (process) that I’ve seen in several teams across multiple projects is that they have a common list of tasks that is applicable to most of their user stories. The general agreement on these teams (A.K.A. ‘ways of working’) is that this list of tasks is aligned with their ‘definition of done’; that is to say: if we, as a team, complete all these tasks in this list, then we have met our ‘definition of done’ which we have communicated and agreed upon with our entire team (including all the stake holders).
One example of such list of tasks is:
- Design DB
- Build UI Screen
- Build automated tests
(I’ve seen many types of tasks make into this list but I’ve kept it short to simplify the example)
Once the team has agreed on this list, it usually becomes the job of the DEV Lead (or business analyst, project manager or whoever is assigned with the task of managing the backlog) to create these tasks for each and every user story in the backlog.
One way of creating these tasks in a ‘semi-automated’ fashion is to use TFS tools for Excel (which are installed as part of Visual Studio).
Here are the steps that will help you create all these tasks:
1. Very often, these tasks will need to be created at the beginning of every sprint so we will start by creating a TFS query for a sprint.
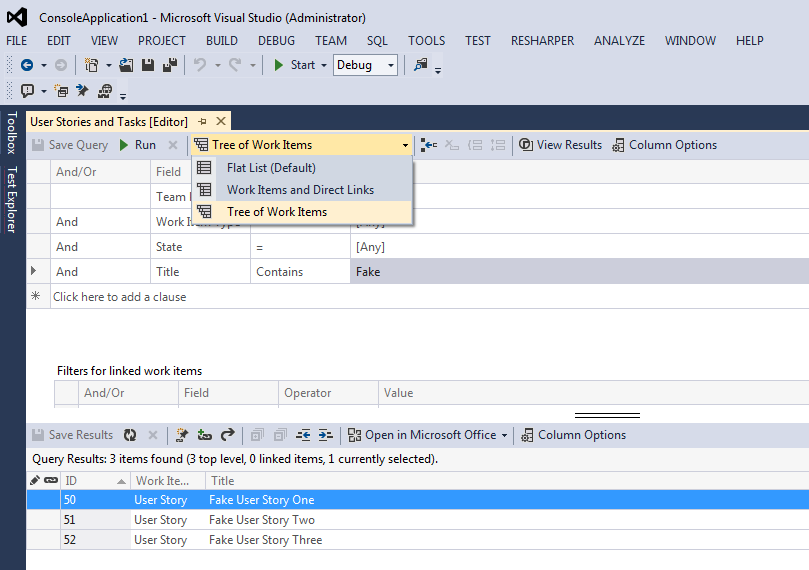
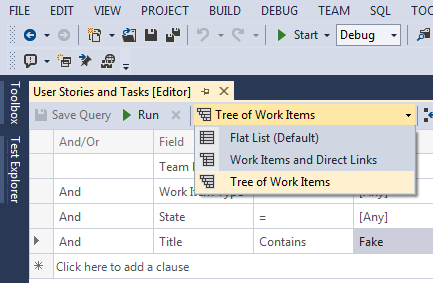
2. Change the query type from Flat List to Tree of Work Items
This is important because it will allow us to create all the tasks in Excel and automatically link them to their parent stories.
3. Running the query at this point will show us just the list of stories as there are no sub-tasks defined yet.

4. Double-Click on the first story in the list and you will be presented with the story details.
We will now create Manually the list of tasks for the this first story that will serve as our template for all other stories.
Click on the All Links tabs and you will see an empty list of related items.

5. Click on the New button and you will be presented with the screen to create a linked item.
Make sure that the Link Type is ‘Child’ and that the Work Item Type is Task
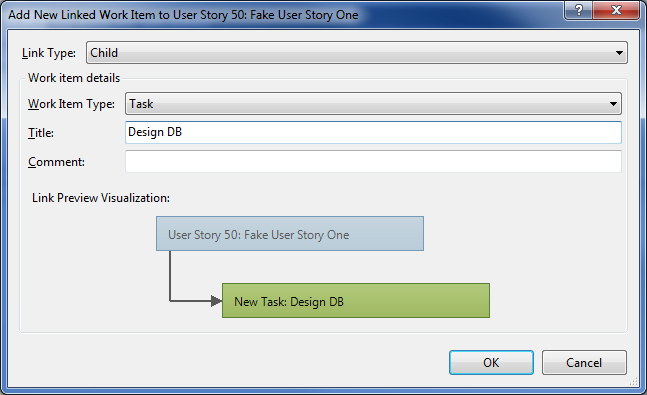
Give the task a new Title: Design DB
Click OK
Repeat this step for the other two tasks in our example
6. Refresh the screen and you will now see three tasks as linked child items for this story.
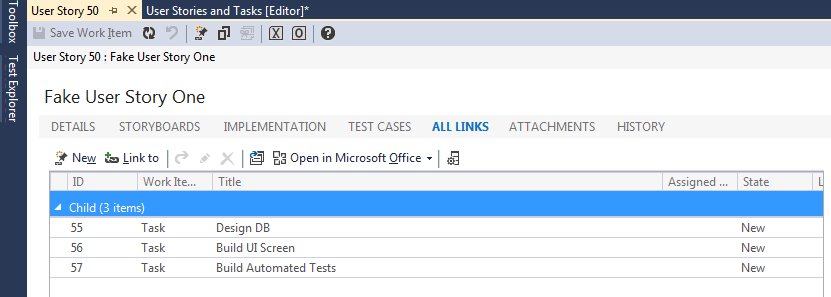
You may now close the story details tab
7. Refresh the TFS query result and it will now show that the first story has three sub tasks linked to it

8. In the Query Result pane, click on Open in Microsoft Office and then choose Open Query in Microsoft Excel
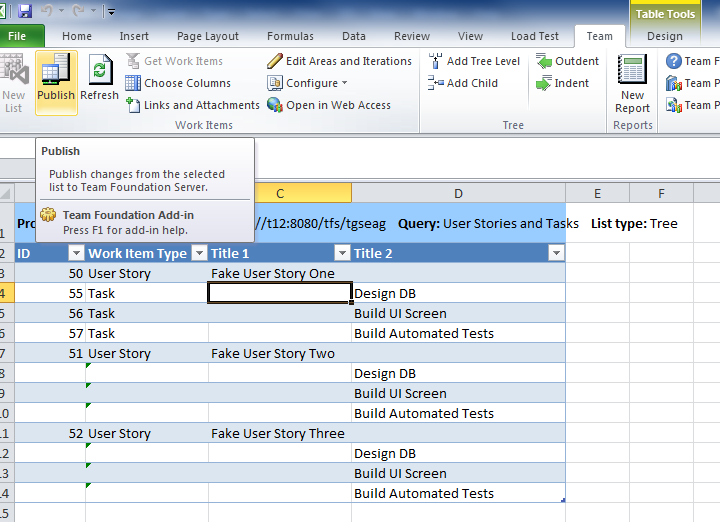
After a few seconds, Excel will open and the same list of stories and tasks will show. If this is the first time you work with TFS Tools for Excel, pay attention to the new Excel tab: Team. This new tab holds all the new Excel commands for TFS.
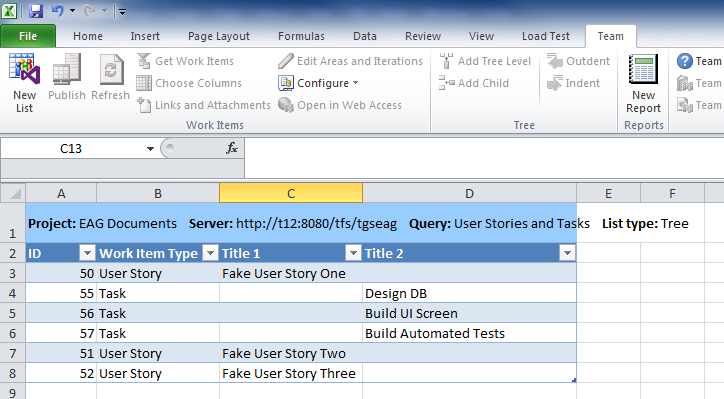
9. Add three new lines below every user story in the list.
Copy the three sub-tasks names that are linked to the first user story.
Paste these cells in the new cells that you created for every story.
IMPOTANT: Paste the tasks names in the Title 2 column. This is the column that represents the child tasks names. The Title 1 column is actually the parent user story’s title.
If your click Publish at this point you will receive a dialog box that will tell you that 0 work items were published successfully.
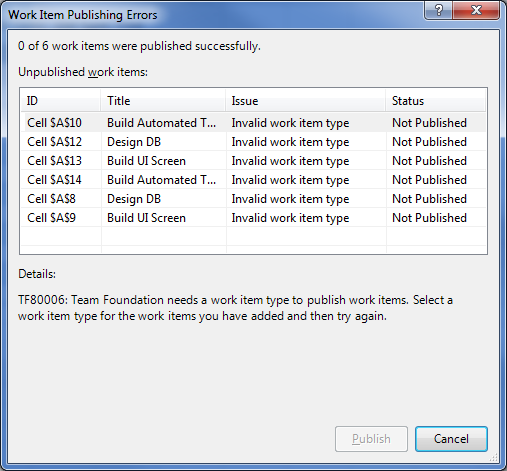
This is happening because we have not defined yet the work item type.
So for the new lines that we created, fill in the Work Item Type cells and choose Task
10. Click ‘Publish’ and the new work items will be pushed to TFS and the list will be refreshed with the new tasks IDs
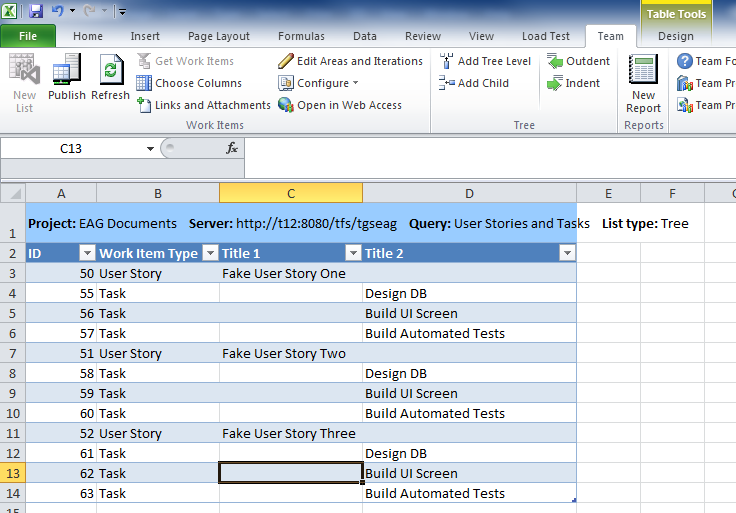
You may close Excel and switch back to Visual Studio.
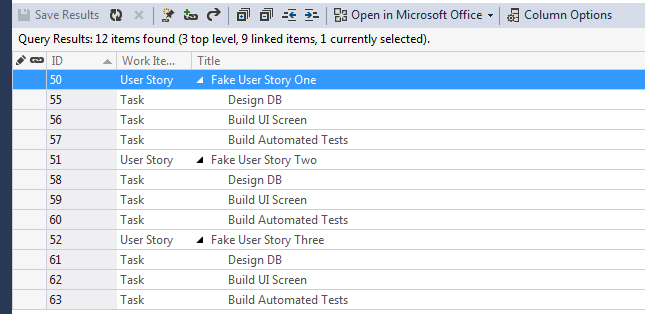
11. Refresh the TFS query and you will see that all your stories will now have three linked tasks:
